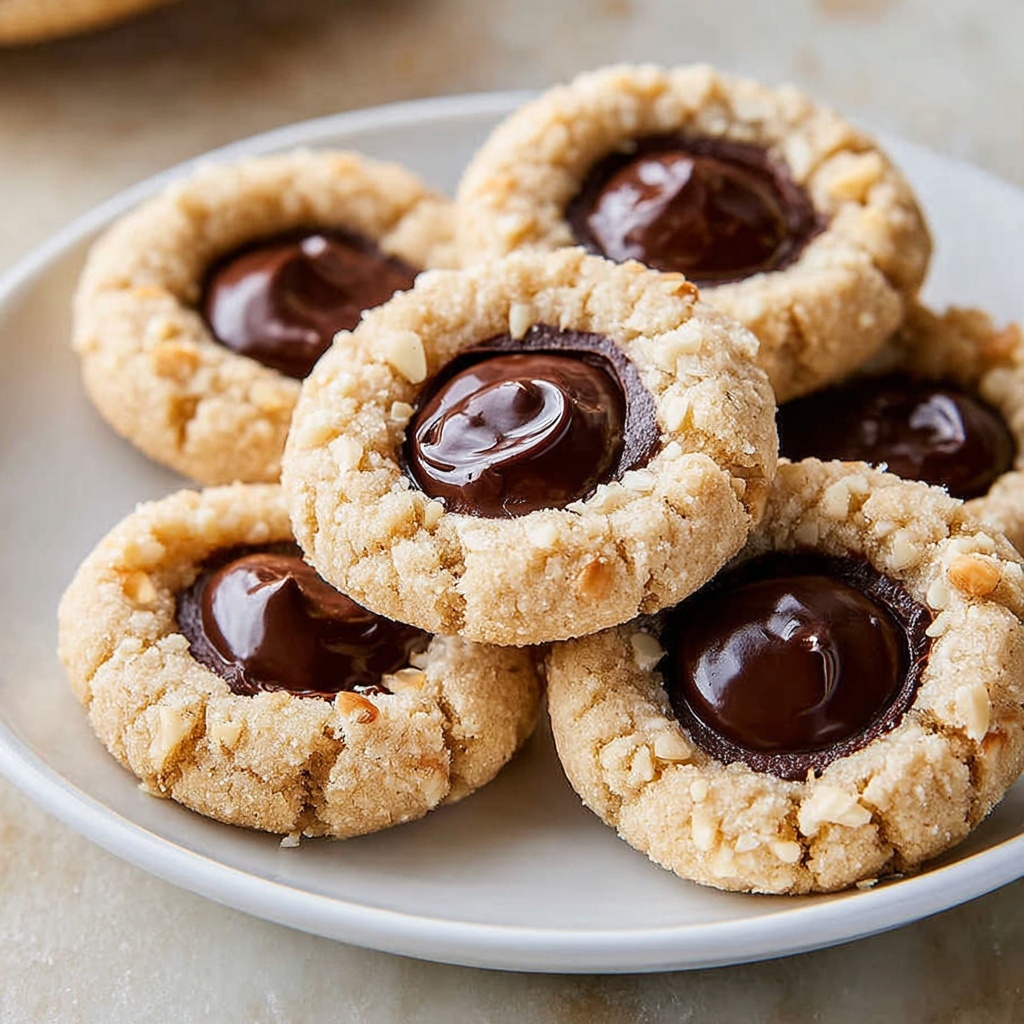
If you have a soft spot for irresistible cookies, then this Chocolate Hazelnut Thumbprint Cookies Recipe is about to become your new favorite indulgence. These cookies perfectly balance a tender cocoa-infused crumb with the crunch of toasted hazelnuts, and the rich, creamy chocolate hazelnut center makes each bite an absolute delight. They bring together simple ingredients in a way that feels both comforting and a little bit fancy, turning every bite into a celebration of chocolate and nutty goodness. Whether baking for a cozy afternoon treat or bringing a batch to share with friends, these cookies never fail to impress and satisfy all your sweet cravings.
Ingredients You’ll Need
Ingredients You’ll Need
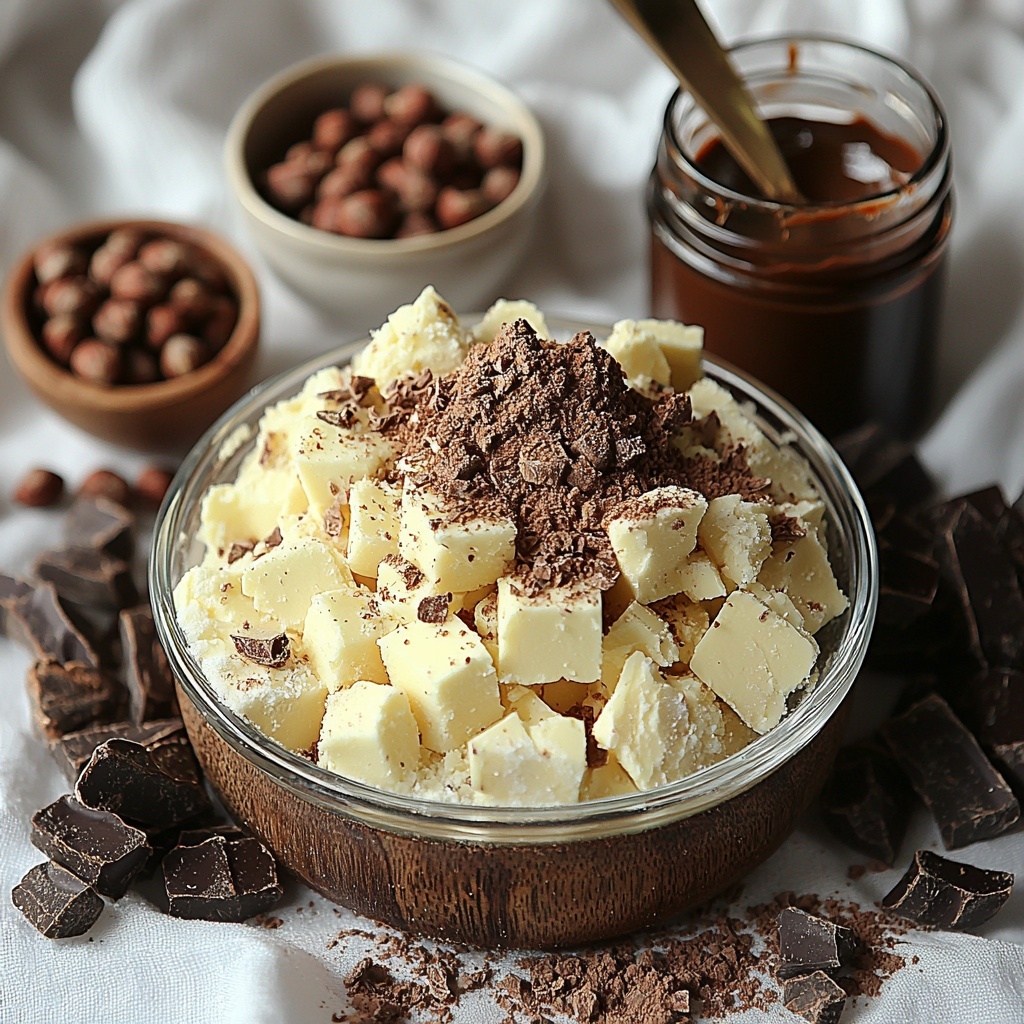
The magic behind this Chocolate Hazelnut Thumbprint Cookies Recipe lies in its straightforward yet thoughtfully chosen ingredients. Each one plays a crucial role in delivering the perfect texture, flavor, and that irresistible chocolate-hazelnut punch.
- 1 cup unsalted butter (softened): Adds richness and helps create that melt-in-your-mouth texture.
- 2/3 cup granulated sugar: Sweetens the dough and helps with proper browning.
- 2 teaspoons vanilla extract: Enhances the deep chocolate notes with a warm, aromatic undertone.
- 2 cups all-purpose flour: The base that gives structure to the cookies.
- 1/2 cup cocoa powder: Brings intense chocolate flavor and a lovely dark color.
- 1/2 teaspoon salt: Balances sweetness and enhances overall flavor profile.
- 1/2 cup finely chopped hazelnuts (for rolling): Introduces a satisfying crunch and nutty character.
- 1/2 cup chocolate hazelnut spread (like Nutella): The luscious filling that elevates these cookies to dreamy decadence.
- Extra whole hazelnuts (optional for garnish): Adds a charming decorative touch and extra crunch.
How to Make Chocolate Hazelnut Thumbprint Cookies Recipe
Step 1: Prepare Your Oven and Baking Sheets
Start by preheating your oven to 350°F (175°C) and lining two baking sheets with parchment paper. This step ensures your cookies bake evenly and come off the pans easily without sticking, making cleanup a breeze.
Step 2: Cream Butter and Sugar
In a mixing bowl, cream together the softened unsalted butter and granulated sugar until fluffy and light. This aeration is what gives your cookies that tender crumb and slight rise.
Step 3: Add Vanilla Extract
Mix in the vanilla extract to the butter and sugar mixture. The vanilla brings warmth and depth, aligning perfectly with the chocolate and hazelnut flavors you’ll add next.
Step 4: Combine Dry Ingredients
In a separate bowl, whisk together the all-purpose flour, cocoa powder, and salt. This ensures the cocoa and salt are evenly distributed so every cookie has consistent flavor and texture.
Step 5: Mix Dry Ingredients into Wet
Gradually add the flour mixture into the creamed butter and sugar, gently folding until a smooth dough forms. Be careful not to overmix, as that could make your cookies tough instead of tender.
Step 6: Shape and Coat Cookies
Roll the dough into 1-inch balls, then coat each one in finely chopped hazelnuts. This nutty exterior adds a delightful crunch and makes every bite a little more exciting.
Step 7: Create Thumbprints
Place the coated dough balls onto your prepared baking sheets, then press your thumb gently into the center of each ball to create a small indentation. This is where the gooey chocolate hazelnut spread will go.
Step 8: Bake and Fill
Bake the cookies for 12 to 14 minutes until just set. While they’re still warm, fill each indentation with the chocolate hazelnut spread. Doing this when the cookies are warm helps the filling settle perfectly without melting away.
Step 9: Cool Before Serving
Allow the cookies to cool completely on the baking sheets. This cooling step lets the filling set and the flavors marry, making every bite perfect.
How to Serve Chocolate Hazelnut Thumbprint Cookies Recipe
Garnishes
For an elegant touch, place a whole hazelnut on top of the chocolate hazelnut filling once the cookies have cooled. It adds a subtle crunch and enhances the nutty flavor, making these cookies look as good as they taste.
Side Dishes
Serve these chocolate hazelnut thumbprint cookies alongside a cup of hot coffee or a rich glass of milk for a classic pairing. They’re also fabulous with a scoop of vanilla ice cream or a dollop of whipped cream for an indulgent dessert treat.
Creative Ways to Present
Arrange these cookies in a pretty tin or on a decorative platter lined with parchment paper, perfect for gifting or elevating a casual gathering. You can also drizzle melted white chocolate over the top for beautiful contrast and extra sweetness.
Make Ahead and Storage
Storing Leftovers
Store any leftover cookies in an airtight container at room temperature to keep them soft and fresh for up to a week. Layer them with parchment paper to prevent sticking and preserve their delicate texture.
Freezing
You can freeze the dough balls before baking for up to three months. Just roll and coat them in hazelnuts, then freeze on a tray before transferring to a freezer-safe container. When ready to bake, no need to thaw—just add a couple of extra minutes to the baking time.
Reheating
Warm leftover cookies in a low oven or microwave for a few seconds to revive the gooey filling and soften the cookie just like fresh-baked. Be careful not to overheat, or the filling might become too runny.
FAQs
Can I use other nuts instead of hazelnuts?
Absolutely! While hazelnuts are classic here, finely chopped almonds or pecans can be great substitutes and add their own unique texture and flavor to the cookies.
Is this recipe suitable for vegans?
This recipe uses butter, so it’s not vegan as written. However, you can try using a plant-based butter substitute, and make sure your chocolate hazelnut spread is vegan-friendly for a vegan twist.
How do I prevent the cookies from cracking?
Make sure your butter is softened but not melted and that you mix the dough just until combined. Overworking the dough or using melted butter can cause cracks during baking.
Can I use store-bought chocolate spread or should I make my own?
Store-bought chocolate hazelnut spreads like Nutella work perfectly for this recipe, saving you time while delivering luscious flavor. If you want a homemade version, a blend of melted chocolate and hazelnut butter can also work wonderfully.
How long will these cookies stay fresh?
When stored correctly in an airtight container at room temperature, these cookies stay fresh and delicious for up to a week—a perfect treat to enjoy over several days!
Final Thoughts
There’s just something so wonderfully satisfying about this Chocolate Hazelnut Thumbprint Cookies Recipe. It’s the kind of recipe that invites smiles, whether you’re baking alone or sharing with loved ones. Every bite offers a perfect moment of chocolatey, nutty joy that feels both special and comforting. Give these cookies a try—you might just find yourself reaching for the recipe again and again because nothing beats a homemade treat made with love.
Print
Chocolate Hazelnut Thumbprint Cookies Recipe
- Prep Time: 15 minutes
- Cook Time: 14 minutes
- Total Time: 34 minutes
- Yield: 24 servings
- Category: Dessert
- Method: Baking
- Cuisine: American
Description
Delicious and rich Chocolate Hazelnut Thumbprint Cookies that combine a tender cocoa-infused dough rolled in crunchy hazelnuts with a luscious chocolate hazelnut spread center. These cookies are perfect for chocolate lovers seeking a delightful treat with a perfect balance of textures and flavors.
Ingredients
Cookie Dough
- 1 cup unsalted butter (softened)
- 2/3 cup granulated sugar
- 2 teaspoons vanilla extract
- 2 cups all-purpose flour
- 1/2 cup cocoa powder
- 1/2 teaspoon salt
Coating and Filling
- 1/2 cup finely chopped hazelnuts (for rolling)
- 1/2 cup chocolate hazelnut spread (like Nutella)
- Extra whole hazelnuts (optional for garnish)
Instructions
- Preheat Oven: Preheat your oven to 350°F (175°C) and line two baking sheets with parchment paper to ensure easy cookie removal and prevent sticking.
- Cream Butter and Sugar: In a mixing bowl, cream together the softened butter and granulated sugar until the mixture is fluffy and light. Then, add the vanilla extract and mix until combined to develop a flavorful base.
- Combine Dry Ingredients: In a separate bowl, whisk together the all-purpose flour, cocoa powder, and salt to evenly distribute the cocoa and seasoning throughout the dough.
- Mix Dough: Gradually add the dry ingredients into the butter mixture, stirring until a uniform dough forms. Be careful not to overmix to keep the cookies tender.
- Form Cookie Balls: Roll the dough into 1-inch balls, then coat each ball by rolling it in finely chopped hazelnuts to add crunch and flavor. Place the coated balls on the prepared baking sheets spaced evenly apart.
- Create Indentations: Use your thumb to gently press an indentation into the center of each cookie ball, creating space for the filling after baking.
- Bake Cookies: Bake the cookies in the preheated oven for 12-14 minutes, until set but still soft. The small baking time keeps the cookies tender with a slight chew.
- Fill with Spread: Remove the cookies from the oven and while they are still warm, fill each indentation with chocolate hazelnut spread. The warmth helps the spread soften and meld with the cookie.
- Cool and Serve: Allow the cookies to cool completely on the baking sheets so they set properly before serving. Optionally, garnish with extra whole hazelnuts for presentation.
Notes
- Ensure the butter is softened but not melted for best creaming results.
- Rolling the dough balls in chopped hazelnuts adds texture and enhances the nutty flavor.
- Filling the cookies while warm helps the spread meld with the cookie surface.
- Store cookies in an airtight container at room temperature for up to 5 days.
- For a gluten-free option, substitute the all-purpose flour with a gluten-free flour blend.


